Best Way to Clean Keurig: Quick & Easy Tips for Fresh Brews!
Purchasing products via the links in our article may result in us earning a commission, but rest assured, this does not influence our editorial independence.
For coffee lovers, a Keurig coffee machine is a daily source of joy and caffeine.
However, to ensure that your Keurig continues to provide that perfect cup of coffee, regular cleaning and maintenance are essential. Not only does this practice extend the life of your machine, but it also guarantees that each brew is as delicious as the last.
In this guide, we’ll explore the best way to clean your Keurig, ensuring it operates at peak performance.
Signs Your Keurig Needs Cleaning
Your Keurig will often tell you when it’s time for a clean. Here are some common indicators:
- Slower Brewing Times: If your coffee is taking longer to brew, it could be due to calcium buildup in the machine’s inner workings.
- Unusual Noises: Gurgling or straining sounds can signal that it’s time for descaling.
- Poor Coffee Taste: Changes in the taste of your coffee might be due to oil and residue buildup.
- Error Messages: Some Keurig models will display a descaling message or light.
- Visible Scale Deposits: If you can see mineral buildup in the water reservoir, it’s time to descale.
Regular Keurig maintenance, including descaling and cleaning, can prevent these issues and ensure your machine runs smoothly.
Preparing to Clean Your Keurig
Before you start the cleaning process, gather the following materials:
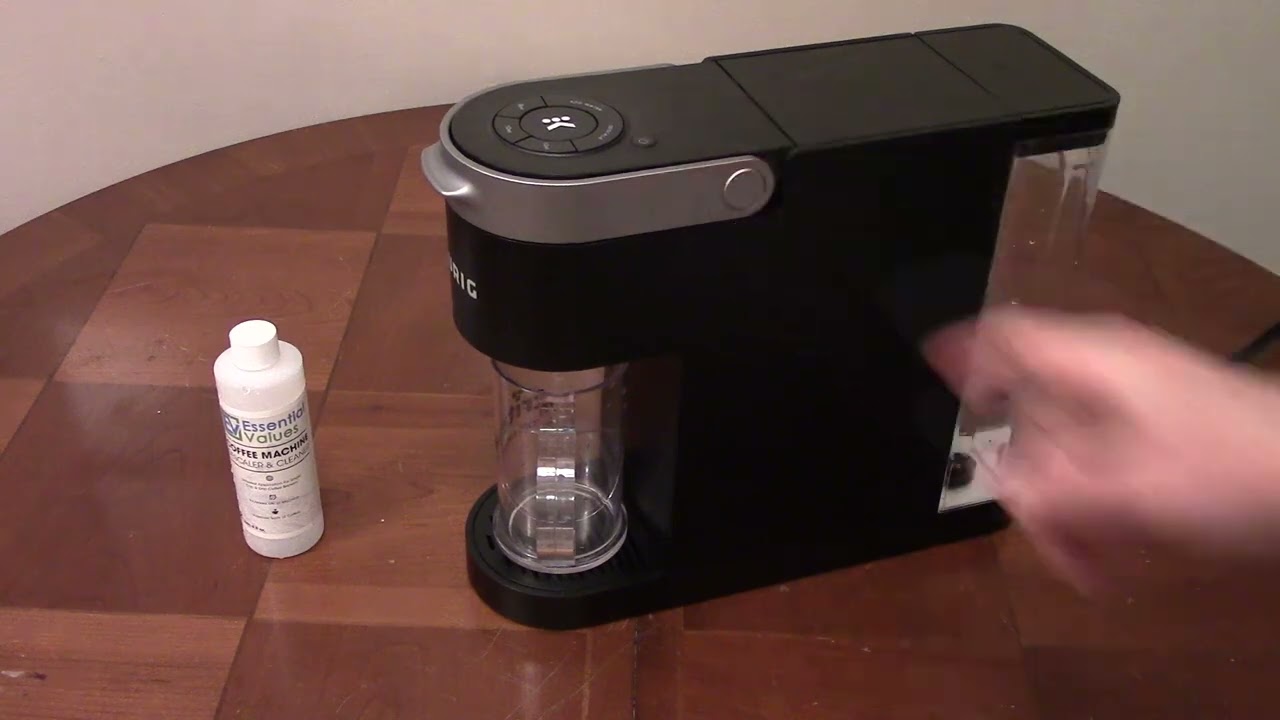
- Keurig cleaning solution or white vinegar
- Fresh water
- A large ceramic mug (not paper or plastic)
- A soft cloth or sponge
- A dry, lint-free cloth
If you don’t have a commercial Keurig cleaning solution, white vinegar is an effective alternative for descaling.
Step-by-Step Cleaning Process
Unplugging and Disassembling
Safety first: ensure your Keurig is turned off and unplugged. Remove the water reservoir, lid, drip tray, and K-cup holder.
Cleaning the Removable Parts
Wash all the removable parts in warm, soapy water. Rinse thoroughly and let them air dry. For Keurig maintenance, it’s important to avoid harsh chemicals that could damage the machine.
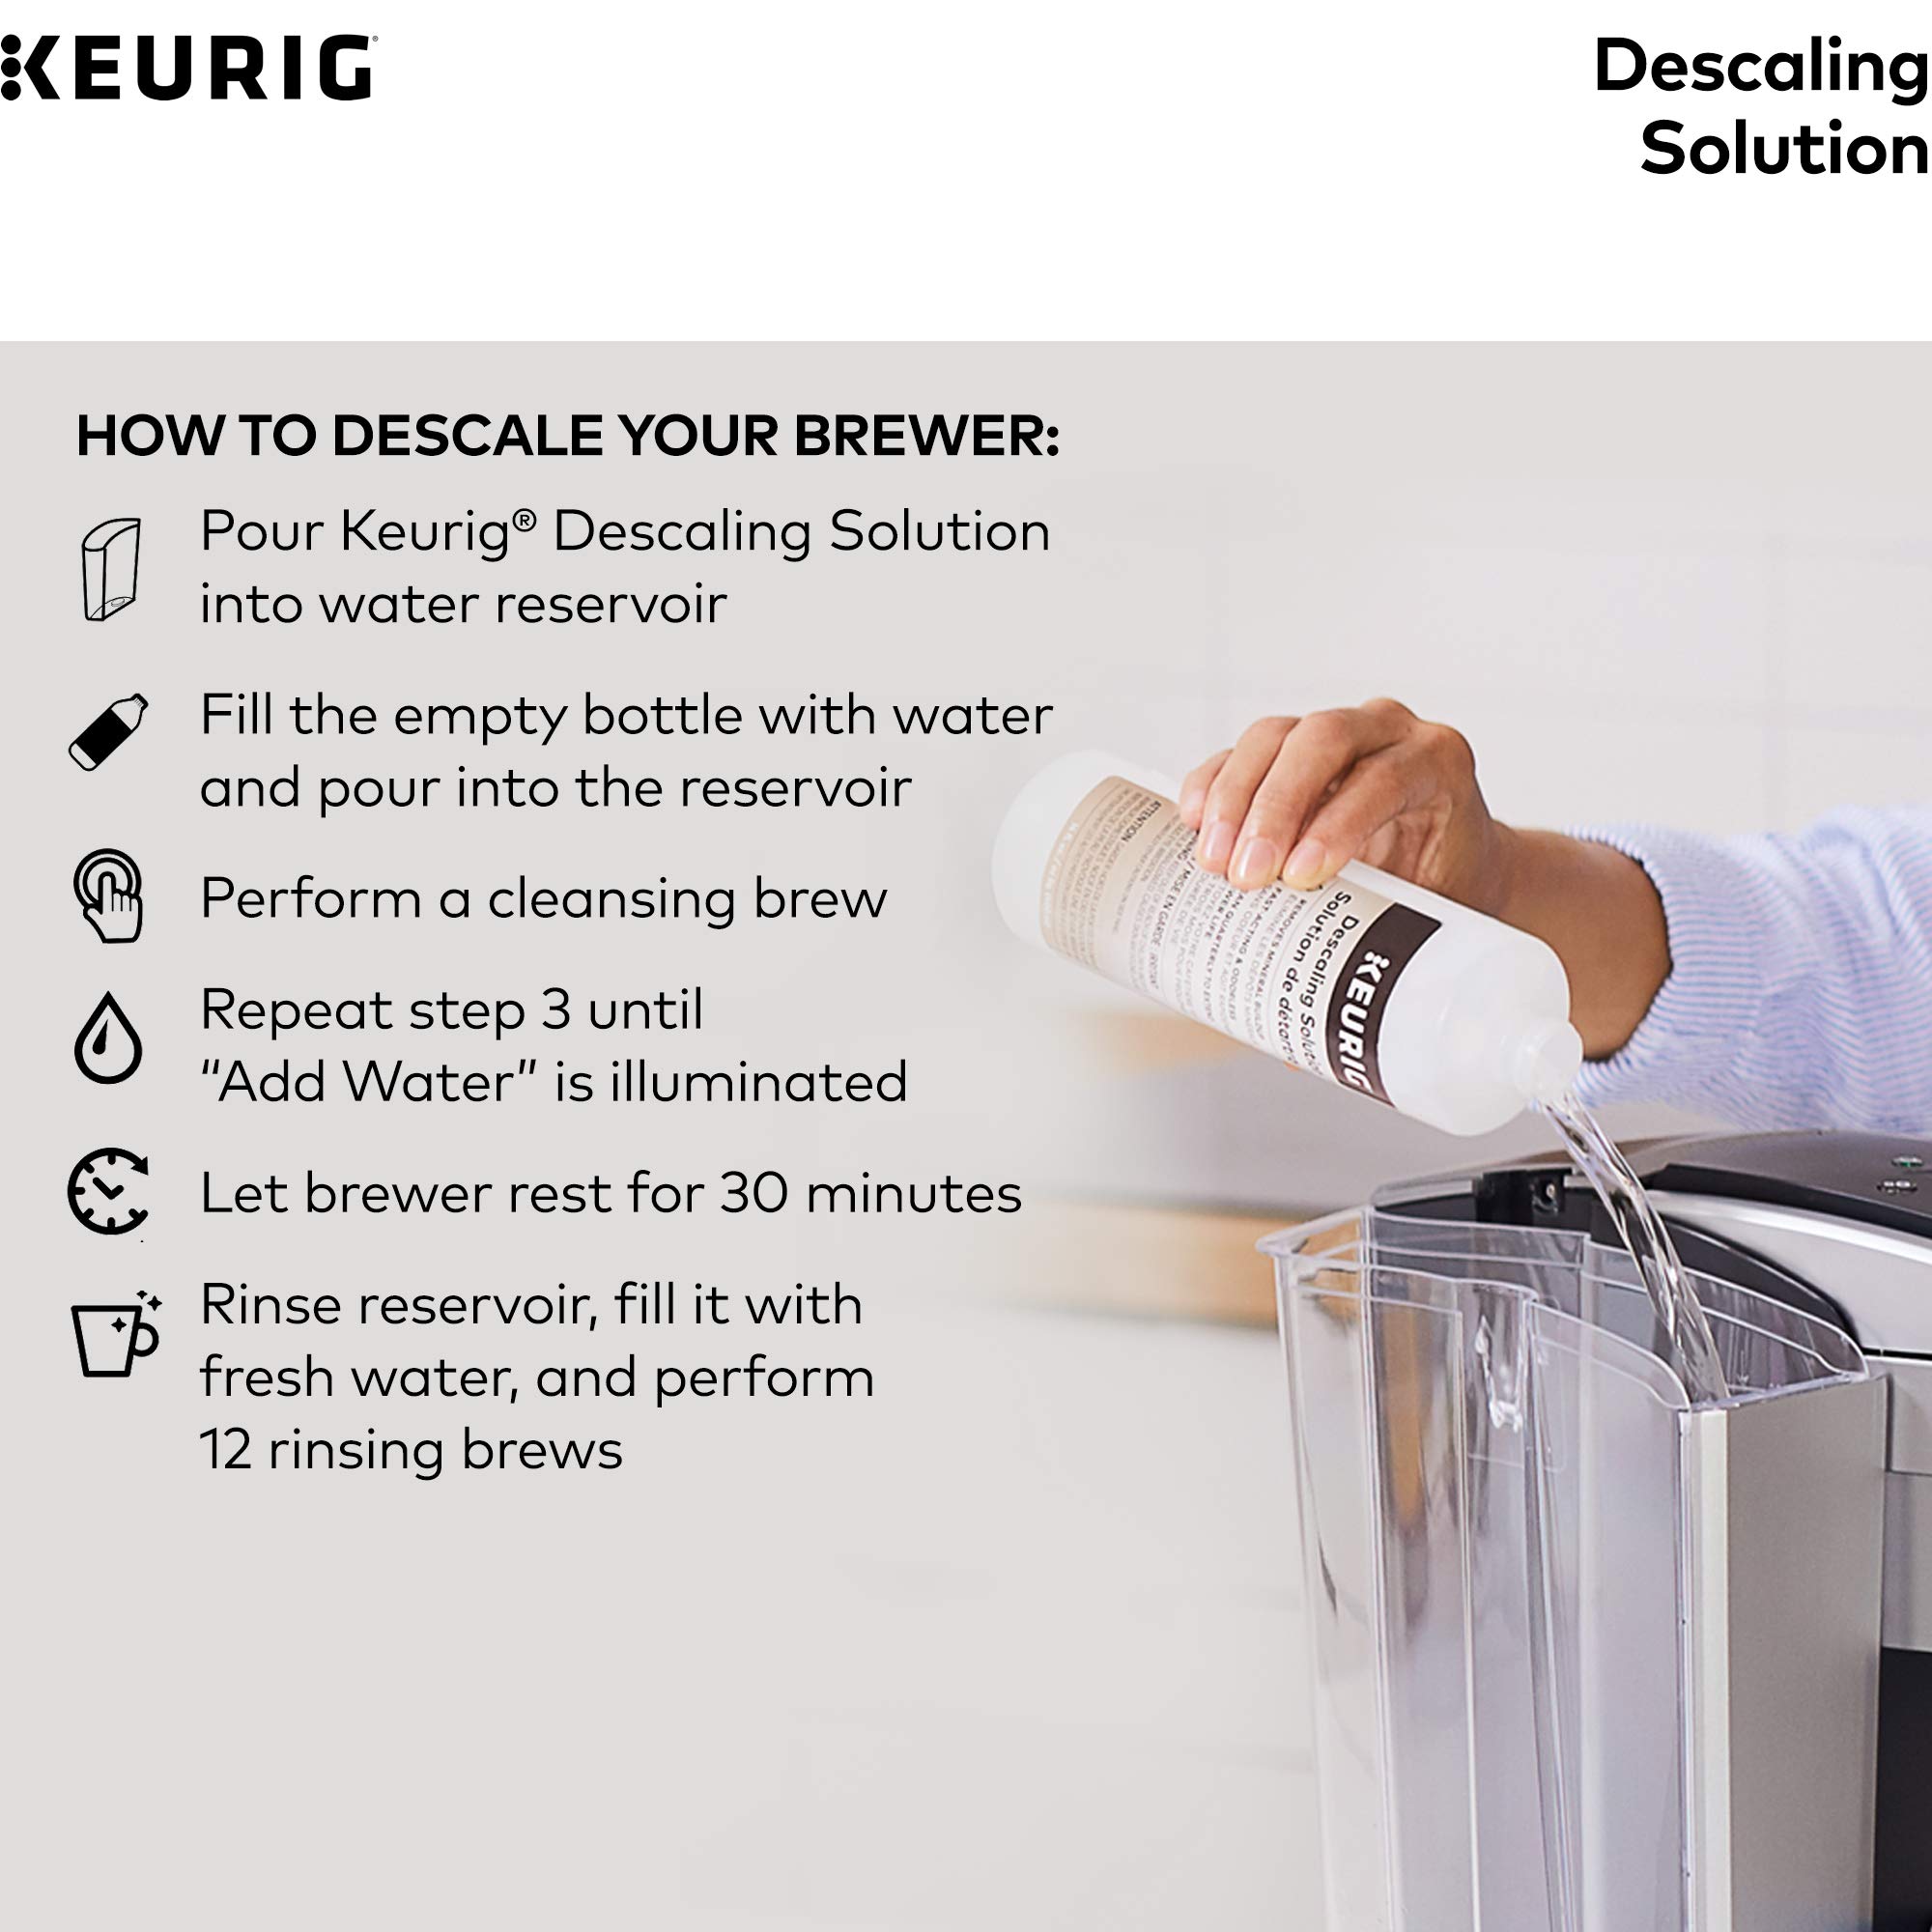
Descaling the Water Reservoir
Fill the water reservoir with a 1:1 mixture of white vinegar and water, or the Keurig descaling solution. Start the brew cycle without a K-cup and repeat until the reservoir is empty, discarding the contents of the mug after each cycle. Rinse the reservoir thoroughly and fill it with fresh water. Run additional brew cycles until the vinegar taste and smell are gone.
Cleaning the Needle and Exit Duct
Use a paperclip to clear any debris from the needle that pierces the K-cups. For the exit duct, use a soft cloth or sponge to wipe away any coffee grounds or residue.
Reassembling and Performing a Cleansing Brew
Once all parts are clean and dry, reassemble your Keurig. Fill the reservoir with fresh water and perform a cleansing brew to flush out any remaining cleaning solution.
Aftercare and Maintenance Tips
To keep your Keurig in top condition, descale every 3 to 6 months and clean the removable parts weekly. Use filtered or bottled water to reduce scale buildup. After each use, remove the used K-cup and leave the lid open to allow the machine to air out.
Conclusion
Cleaning your Keurig may seem daunting, but with this step-by-step guide, it’s a simple task that ensures your machine continues to produce high-quality beverages. Make Keurig cleaning and maintenance a regular part of your routine, and enjoy the perfect cup of coffee every time.
Emily Brown
Emily Brown is a professional cleaner with over 15 years of experience in the industry. She has a wealth of knowledge on the various descaling solutions and methods and is passionate about sharing her knowledge through her writing on the blog Descaler Genius. She also runs her own cleaning business, where she helps customers maintain their appliances and keep their homes clean and tidy.